Tuesday, December 31, 2024

Lela Drawstring Skirts


I thought a drawstring topped skirt would be a useful addition to my wardrobe, and chose this SewDIY.Com pattern to try. I used an old tablecloth which came from my Aunt's house when we were clearing it out some years ago. I love fabrics with story and connections.

The weight was perhaps a little heavier than ideal, but the pattern I absolutely love. The age of the table cloth meant there were a few holes and spots of wear and tear to navigate in the cutting. But that was well and truly off set by the fun of pattern matching. This is not something anyone else will appreciate, but it makes me smile when I wear this skirt.

I made S14, and straightened the lower hem, matching front and back hem length.

I was thinking this would be a casual skirt but have worn it to work a few times. 

I love pattern. Geometric, line and shapes are my favourites. Oh and I like colour. This does present a problem as I need some plain pieces to match with all the pattern!

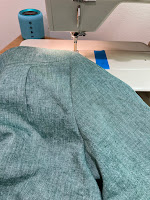
This winter I was lucky to have a week long trip to Bali, going from mid to low teen temperatures to high twenties. A couple of weeks out I came to thinking a travel skirt would be good. This pattern is so easy it lent itself to a quick make. I made this from my stash, once again fabric with a connection - this linen came from a friend's collection after she died.

This time a monotone brown/grey, perfect for travelling and matched everything else I took with me. I had 1.1m of 140cm wide fabric - perfect match.


Monday, December 30, 2024

Scrap Busting Remy Raglan

I was inspired to make a scrap top after seeing Blogless Anna’s ‘Jigsaw Puzzle’ Remy Raglan.

It was a detour away from my, now long-standing, goal of sewing up fabric I have bought, but I couldn’t resist. Plus in January we are going to be in Melbourne, and anticipate it will be hot, very hot, so loose fitting linen had appeal.

I consulted an expert fabric friend about my options, and narrowed it down to four pieces. Similar weights and something in common in terms of colour and pattern.

I was a little uncertain about how to put these together, and settled on the pattern for the sleeves, mainly as there was not a lot of this. In fact I ended up with a centre seam on one seam. While I was feeling quite pleased with this I realised I had cut two identical sleeves instead of a pair!

Unusually for me, I did not cut the whole garmet out to start. Instead I made the sleeves and the front first before settling on the final choice for the back.


My decision was the blue, I can’t resist mixing colour. But, I slept on it, and, here’s a confession, in the early hours of the morning I thought about Sarai Mitnik’s rule of three. This is a gem of advice from the Seamwork founder, helping sewers  to create and wear garments. What three outfits can you create with the garment you are about to make?

So I pared it back, using the same green brushed cotton for the back as well as the front.

The result is safer, I still like the colour contrast which Anna put together so well. But I hope it will mix and match with more pieces in my wardrobe.


This is a loose fitting top and I trimmed 15mm from the side seams. I made S 12. Turns out the sleeves worked OK with a little trimming too.

Thursday, December 26, 2024

A Travel Bag - Take 1

 There is nothing like make-your-own to solve a gap. After a trip in April this year, I wanted a smaller bag to take on the plane and when out exploring. Enough to fit a cardigan and drink bottle, plus the other 'essentials' which are good to have on hand when you head out for a day of uncertain activity in a new location. Time to to confess I am hopless at travelling light.


This project was the third bag I have made from a Japanese sewing Pattern Book I bought in Tokyo in 2019. So good to actually use sewing related materials, fabric and patterns.
I know from past experience the check the scale, most things Japanese are smaller than a Kiwi girl might expect!


Fabric was a mix of stash lining combined with some inexpensive heavier fabric from our local emporium. The straps came from Miss Maude.

There was some learning in the making of this bag. Slightly awkward to sew but actually my faithful Bernina 900 handled it OK. It is still good to stop and check proportions along the way. The dome closure straps were miles too long, and I was modifiying these the night before a trip. The corflute I used in the base was too thick which meant the bag was not comfortable on the back. This was easier to remedy than I thought, and a slimmer weight piece of plastic folder worked well. 

After a week long trip overseas the size was OK, except the side pocket for a drink bottle is too small for my typical sized bottle. The 4cm straps were a little to wide to comfortable hold when carrying by hand - so I sewed these together at a friend's suggestion. Main issue though was a zip would be better across the top. July 2025 I have a trip booked, enough time to make another version.


Remy Raglan


Finally I have made this infamous pattern! The Sew House Seven Remy Raglan. The fabric I purchased on line from The Fabric Store after seeing a shirt on IG. And it languished in my stash until I made this match.


The pattern is very straightforward. I liked the instruction blog, which lovely clear pictures. I made S12, adding to the length of the body and sleeve (I’m 5’9”). The french seams are a nice finish, and the neck binding and button tab works well.


I do love the sleeves, great length and easy to wear and the slim cuff is a nice touch.


Turns out I have worn this a lot with a me-made Augustina Boxy Top, and a Simplicity 4036 Skirt which are faithfuls in my work wardrobe. 

Monday, November 25, 2024

In The Folds Barkly Skirt


I like a good skirt! Short skirts, well above the knee length, are often worn items in my wardrobe. These include both RTW and me-made. 

This pattern ticks a few boxes; 
  • slightly A line, 
  • pockets, 
  • fitted waistline with no gathers or pleats.
The instructions were straight forward. Another plus was its many panels it can be cut out of a smallish piece of fabric.

Which leads me to the fabric. This was something I was gifted. The donor thought of me as it fits well in my colour pallet. And I like the combo with teal as worn here.

BUT, here’s the thing. It was very weighty fabric, more upholstery weight than garment weight. This is opposite to the problem I have had recently with too lightweight fabric!

I wore this a few times, and then donated it. I wonder if it found a new owner, and did they have the same experience as I did, and feel like they were wearing the sofa.

I will definitely make this skirt again, just choose the fabric with more care!

French Navy The Langston Trousers


These are my Langston pants. My sewing bud Cate tells me they are ‘on trend’ which makes me smile. I am seldom ‘on trend’!

I enjoyed the detail in this pattern, and the top stitching, and fun pockets. I left off the claw hammer strap. 

At the start I decided to tack the key pieces together to check the fit. Good plan, but by doing this the construction order will not follow the pattern instructions. 

I have a mixed relationship with elasticated pants. Love the comfort, but am overly concerned about the look, especially the back view. Maybe PTSD following Intermediate School rompers. Maybe the back yoke helps with this style.

After wearing these a few times, I take these on and off without undoing the fly. Perhaps the elastic should have been a little tighter. They are comfortable. 

The fit works. I made size E, and added 8cm (3”) to the lower leg. With previous elastic waisted pants I have ended up putting elastic in the cuff. These have quite a wide leg which I like. Good to change things up a bit.


This fabric I bought specifically for casual pants. BUT its weight is too light.

Sadly this has been a theme running through my recent sewing where I am aware at the cutting stage that my fabric choice is going to let me down. So, a goal for 2025 sewing is weight and drape!

One detail which was a bit tricky was the metail zip. I bought one at our local emporium, but the quality was not great. Then, at a sewing retreat, someone recommended trying op shops. Success!

My goal was to make some wear-when-not-working- pants. My go to is usually jeans, and shorts in summer. It is nice to have an alternative.

I think I will make these again, with a heavier fabric - watch this space.


Thursday, November 7, 2024

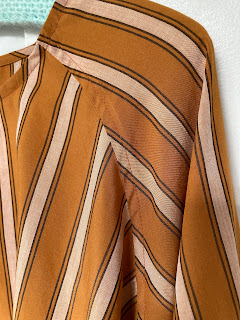
Another Classic Shirt


I like sewing shirts! And making this Liesl and Co Classic Shirt for a third time was fun. See my earlier makes here.

This was an opportunity to lift my game. The fabric was beautiful; yarn dyed, laundered, linen cotton which was soft and also held creases and was easy to ‘finger press’ for those small details during construction.

Examining the fit of my previous Classic Shirts, I made narrower cuffs this time. This shortened the sleeve length which is better. I also lowered the dart and the pockets, just by an inch. In 2022 I had planned and written about sizing down, but actually stayed with size 12. 

I added tabs so I can roll the sleeves up. These tabs did not work where I locate them to start with. They lined up with the sleeve placket opening, and were set too low. It was a small adjustment to move them closer to the front, and lift them. It is a nice detail.

For the collar construction I referred to two posts, Four Square Walls and Closet Core. These show a different order for assembly. I think I should have used hand stitching to the inside facing to control the result. In my research I also found this great Tilly and the Buttons ten tips.

Then I had a wee diaster. Feeling confident, it was all going well, I did the sleeve plackets, managing to sew them on the wrong side of the sleeve, and back to front! Arghhh. My immediate plan was just to live with these back to front plackets. There is not a lot of difference between the right side and the wrong side of the fabric either which was helpful. Does anyone else do this rationalisation? So I continued on the baste the tucks, and sew the sleeve seam. 

Then I did a little research, and found two fantastically helpful guides. I loved Helen’s Closet Patterns and Itch to Stitch’s guide (with helpfully helpfully different fabrics for the three pieces) to sleeve plackets. Particularly the Itch to Stich where there is emphasis on checking right side/wrong side, and a helpful tip to check the small placket is on the skinny/small side of the slit, and the large placket, with the house top, is on the large side. So very helpful, I got it! 

Research always pays off really, is what I am learning. My final help on the placket was this great post from Off the Cuff which showed beginning the placket top stitching at the bottom of the ‘house’. It also explained so clearly the importance of capturing the small clipped triangle with this first line of stitching.


Soooo I unpicked. The sleeve seams, the tucks, the top stitching, and then finally, after a wee pause, I carefully unpicked, stitch by stitch, the original joining seam between the sleeve and the placket. Now this seam is sewn first and then clipped, risky territory to be undoing this. I applied small square of interfacing over this clipped end, to the wrong side. Then I cut the new plackets 1cm longer. Well I actually cut eh new placket to the pattern, then I remember my plan and cut them again with the extra. Good thing this is a small piece. Now I had the wonderful instructions to follow, and I put it all back together.

Inserting the sleeves was a dream. I like to sew up the sleeve seam and the shirt side seam, then insert the sleeve. I use a hand sandwich technique I learned in a sewing class 25 years ago.

Never any gathering thread, and only a few pins. I keep the shirt body on top, and with my hand in between the shirt and sleeve fabric gently ease the fuller sleeve fabric into the machine.

I was surprised at how quickly this shirt came together. This makes me realise thinking a particular make is 'complex', or ‘big’ can deter me. Perhaps I can change the way I approach my sewing. Actually I enjoyed all the small steps; pocket assembly, the ‘burrito method’ for the yoke etc.

One of my current goals is to make better fabric choices. This was a certainly success in this regard. I also want to sew clothes which I wear. I did an analysis of my wardrobe, looking at what I own, versus what I wear, by ‘activity’, e.g. work, weekend, exercise. This highlighted I would like more casual clothes. Different to work clothes, which do dominate my hangers, and previous sewing. This shirt ticks the 'casual' box; I have worn it to work, but I wear it out with friends, or to the supermarket, and feel good doing so.

Monday, August 26, 2024

Venturing Into Underwear

 My two prompts for making undies were Helen and Caroline on Love 2 Sew, and Love_Lucie. It seemed a new challenge, and also one small way to address some of the leftover knit fabric which is starting to mount up.

Three pairs in I was hooked. A year on there is an opportunity for some performance reviews. 

Pattern: Megan Neilson Acacia Undies.

Fabric: I learned early that more stretch is better, much better. And in 2023 I fell in love with some rayon knit. This was leftpver from mighties, so soft to wear. But I must confess that this fabric has not withstood the rigours of regular washing - even in my front loading machine.

Elastic: At first this seemed tricky to find, but then, courtesy of a 10 minute search I managed to order a bunch of different colours, and some patterned. And get the sense that like so many sewing 'materials' it is easy to build up a stash which realistically may last quite a while! At the time of writing I have just released some of the earlier purchased patterned elastics, as this do not equate to comfort, especially around the legs. Fortunately there is a perfectly timed Fabric Rescue event in my area . . .let it go . . . let it go.

As everyone acknowledges, size is always personal preference, and adjustments may be required in only one dimension. 

1 I made S14 to start - slightly volumous in a very stretchy rayon. 

2 Then a pair same size in a less stretchy cotton knit. Same deal, slightly large.

3 But downsizing in the same fabric and using a lingerie elastic which required folding the fabric in created a pair which are possibly a little brief for my taste.

So I have a wee pile of fabric and an opportunity to play with the sizing. 

My 2024 batch of 8 pairs, all from leftovers, has taken my making process up a notch. Starting with the pattern I made a pair in S12, and another in size 12 tapering to S14 in the back, matched with a size 12 front. Small modification to the leg elastic, 1cm longer, and I reckon this is about perfect for the 2024 me.

Fabric for this batch was cotton, cottom/lycra, merino, and unknown. Matching elastic colours worked well for 3 of the fabrics and was more challenging for my pea green merino. I found a cool hot pink FOE at the local Emporium, and liked the colour combo. Sadly though this did not have near enough stetch.

I can see that finding the optimum fabric will always be a bit hit and miss. But this will not deter me from continuing!


The pleasure of small sewing projects in batches.

 Do you ever want to sew, but find when you are on the cusp of a large project actually starting is a bit daunting? This definitely happens for me. Currently I have fabric and patterns set to go for a dress and shirt but to begin, well it seemed to need more energy than I had this past weekend. So a small project is a perfect distraction and a sideways path into sewing!


I made 3 door stops. The need arose as the fabric on an earlier model split, released the sand filling - messy! The pattern is copied from a doorstop made for me by a friend. A wonderful idea, very handy in our climate with wind gusts which can change direction rapidly and often. 

These take a small amount of fabric. This is a floral recycled curtain, which I recall a long time ago purchasing at an op shop. I have mostly made aprons with it to date, but still have several largish pieces left. (I 'rediscovered' these in the ongoing process of moving and organising and shifting things around which seems to be my life. Made worse throurgh a lengthly house renovation and student sons moving in and out of home for the holidays.)

I like batch sewing. The way I can organise the piles and process and see my construction methods evolve, and hopefully improve, through sewing the same things multiple times over.

A modification to these ones are the filling. The last batch I filled only with sand. Once finally stitched up and complete I observed they did not have the same erect shape as the original. Some research revealed I have missed the vital final step of filling the base with sand, and the top with some 'regular' stuffing. For these I recycled some possum wool from a much loved jumper which had shrunk.